Creating Worlds

Sunday, August 16, 2009

Mapping For Games: Altar Room Assignment

So this week my biggest project I need to work on is my Altar Room for Mapping for Games. The assignment is to find images online that are inspiring. Take those and break down the color palette, making sure that they aren't of the same value.

This is the one I chose:


Once we completed that we were given 5 or so altar room models to pick from. After picking the room, we took it into Photoshop and did a paint over using our color scheme. As well as adding elements from our inspirational image. So mine becomes a room based around this magical book and it's butterflies.


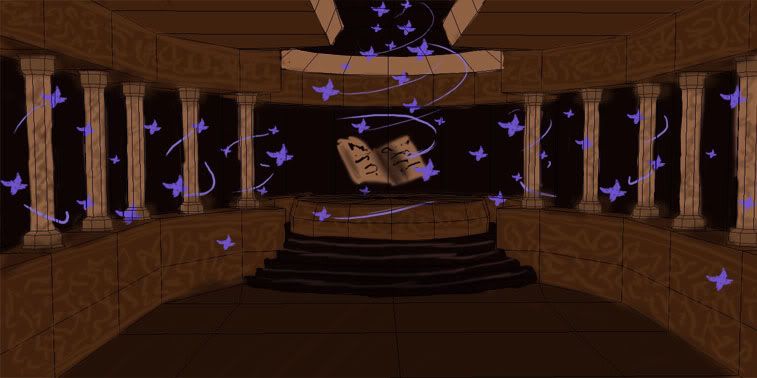
The "scribbles" on the wall and pillars are going to be the language of the book...or something close. I want it to seem like the room was created as a kind of seal or something, so there are enchantments on the walls.

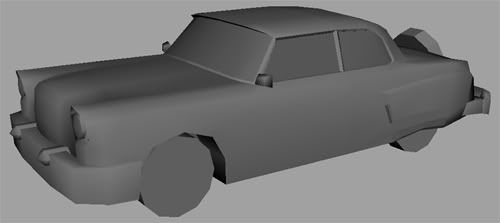
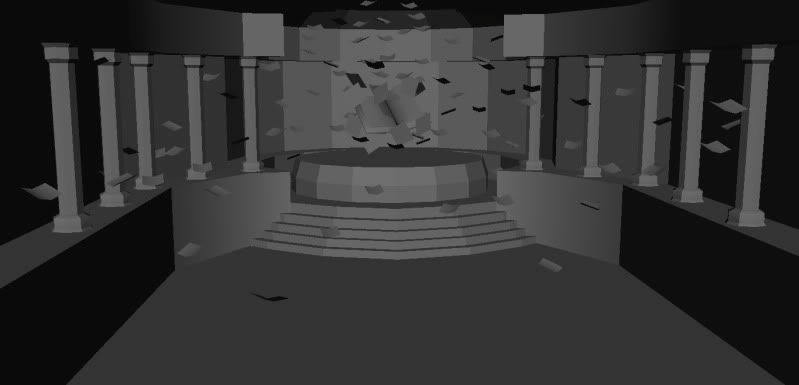
Here's the base model I chose:


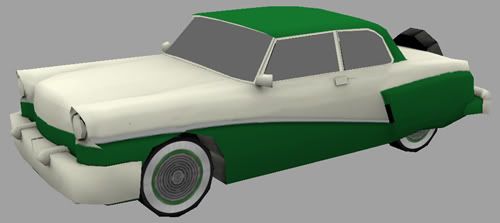
This is with my added models in the room:


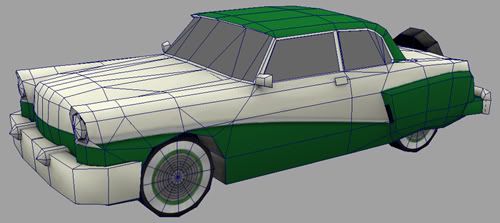
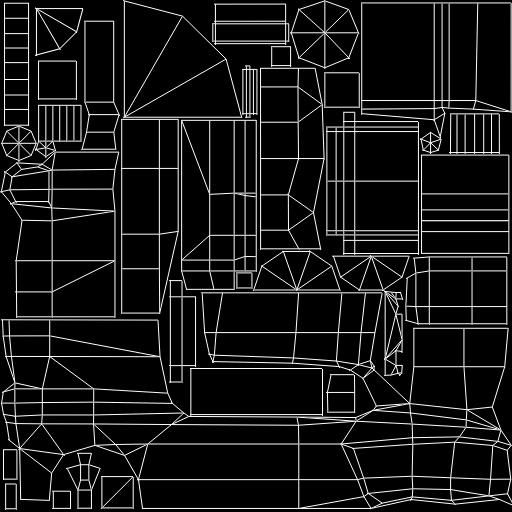
And here's with the wireframe. I'm currently around 2500 tris, with the limit of 5000 including lighting. We are also limited to 3x512 maps, I believe.


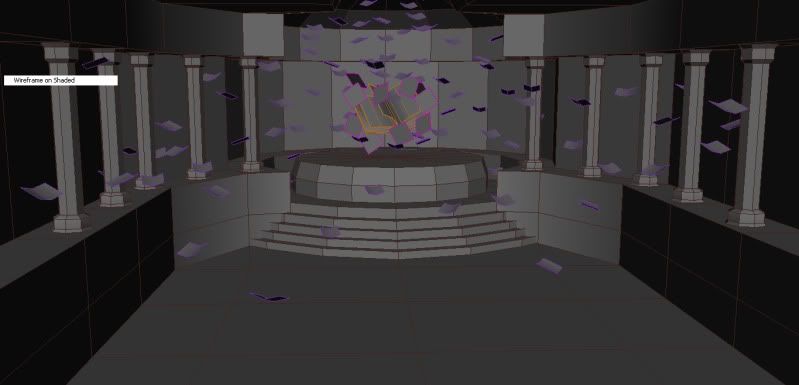
Homework for this week is to put on basic color and materials...so I will be showing you the progress on that once I get started!

Tuesday, August 11, 2009

Monterey Finished, somewhat...

Well...here's how it turned out. If I had some more time there are definitely some things that need some more work. I had a hard time getting the alphas on the windows to work...I ended up having to import in some older windows to get the shader to display in the viewport. These are my model presentations for the class, I thought I would just add them here. I had to down-res the texture so the line on the side of the car got jagged, Y_Y. That is something I definitely want to fix up in the future, as well as redoing the UV's in the back...the taillights are...bleh. That is why I tried to hide them as much as possible.

Detail Presentation Board (Click on the images to get a bigger view):


Beauty Shot Presentation Board:

Monterey Mid-Progress Report

I guess I'm about halfway done now... I went a little crazy with the highlights on the top of the car, those need to be toned down. I also have the Mercury logo on the hood...that needs to go. I don't have a shot but the taillights are well...less than stellar...I didn't prepare for those while unwrapping, I may have to change the type. I still need to flip the front chrome stripe as well as get the chrome around the windows to not be black. And I haven't touched the interior.


Monday, August 10, 2009

ZBrush Anatomy Quiz

Last Friday in Game Modeling & Animation Linh had us take a ZBrush Anatomy Quiz. We have a quiz everyweek. They are timed and usually random objects...the first two were a phone and a projector. Since we had ZBrush hw he decided to see how fast we can sculpt. He gave us 45 minutes to sculpt a body part of our choice. I chose the torso, since that's what I was able to do best on the homework. Since we had to do it for homework though, I barely had to use the reference, just a couple times to make sure my angles and overlapping were in the right places.

I actually kind of finished early, so I added another division level and started making all the muscle lines with a smaller claytubes brush. Even then I finished alot earlier than alot of the other students.

We critiqued them in class and since time was running out I was the last to get a critique, a few students were skipped unfortunately. But overall I didn't get a bad review. My clavicle needs to be more defined, and my gesture is kinda wonky/not there from the side. The biggest thing is adding in a ribcage in the lower subdivision levels, so that its really pronouced. Linh even said that it was the best one of the day, which made me feel awesome. I know that its not perfect, but I'm on the right track!

Here's the different views:


Comments anyone?

Labels: ,

Mapping For Games: Midterm Assignment

The Car. Our first assignment was to choose one of the pre-modeled cars and add an interior to it. The choices were: Trans Am, Barracuda, and Monterey. (I don't know the years but they were all relatively old models 50-60s I think) I looked at some references of all of these on the wonderful web and decided that I liked a certain Monterey model, so that's what I went with.


I'm trying to reference the 1956 model, seen here:

Though I am going with my own green and white color scheme not, the turqouise.

Here is what I ended up with for the model:


And this is it with the wireframe, there are right now 1506 tris, the limit is 1500 so I will be removing 6 of those when I am done texturing. (I'm thinking I will remove some faces on the inside of the back tires, since u can't see them at all anyways.)

Now I had mostly finished this car, but I accidentally saved over the texture file when I was creating the backup.....so I have to start over, this is where I will be starting from:


And this is with the wireframe on to just clarify.

These are my texture maps. We are starting out with a 512x512 map, but then are down res-ing to 256x256 map. We also get 1 128x128 for alphas on the windows, etc. What I have so far:


So this is what I have to start with...I'm hoping to be done in a couple hours from now. I will try and post mid-way progress and what I end up with.

Labels: ,

Friday, August 7, 2009

ZBrush Anatomy Study

Homework this past week for my Game Modeling & Animation was to do a ZBrush anatomy study. Using the given base mesh, SuperAverageMan we were to sculpt out the human muscular system. I can't say for sure how long it too me, definitely longer than I anticipated...I'm guessing around 6 hours. This isn't the first time I've used ZBrush, but that doesn't mean I completely understand the program either. I'm still getting used to the interface which is complicated. The zoom function is completely retarded....I think that alone slowed me down many times, just trying to zoom out and have it rotate to where i wanted and not off the viewport.

Of course since I was adding muscles to an already "skinned" model he turned out kinda on the bulky side. I also realized that I would much rather prefer to start from adding the muscles on someone kinda like bones, because the model was odd in some areas like the calfs and elbows. Which I struggled to get around. The arms turned out REALLY messy. Not so much on the upper arm, but the forearm is a mess. The elbow just won't work out how I wanted it to, I think this is mostly because the images Linh provided for reference weren't in any order and I got confused alot and had to backtrack. So the muscles aren't as clear there as they could be. My calfs are MASSIVE. This is because I made the muscles bigger since well they are large muscles, but the calfs were already calfs........so yeah MASSIVE. Mostly that is my only complaint. It's hard to make something look real with something that is already kinda past that stage. So everything is kinda exaggerated.

Well, here it is, hope it's worth a C, though anything higher would be SUPER. Linh's a very tough grader though, so we'll have to see.

Labels: ,

Saturday, August 1, 2009

First Postage: Summer Quarter 09

I've got 4 classes this Quarter. Intro to Scripting, Mapping for Games, Senior Project Planning, and Game Modeling & Animation. I could quite possibly post for any of these, but I think mostly there will be stuff from Mapping and Game Modeling.

Mapping for Games - Our first assignment has been to texture a car, with a given model that can or doesn't have to have some tweaks. Right now I'm in the texturing stage. I've already UV'd, so its in the final steps. I hope to show how it goes, and at least how it turns out within the next couple of days.

Game Modeling & Animation - We are creating a level and importing it into Unreal Tournament 3 Engine. I've decided to do a Japanese Festival (Matsuri) by the river side, sort of like the Tenjin Masturi, but not. It will be more of a everything from Japan with a similar feel as the Tenjin Matsuri. So far I have boxed it out (waiting for the teacher's approval on the layout), and built one object for the scene (a food booth, specifically for hashimaki). This week though we will be working with ZBrush, doing the Anatomy of a human. Since we will be importing a character as well into the engine. ZBrush and me aren't exactly best buddies, but I will be working my hardest to get it up to Linh's standards! I hope to show that within the week as well. ^_^

Since this was my first post I thought I would just ground it out a little before throwing the images in. But they will probably be within all the posts from here on out so that you all can see my work and hopefully my improvement! I've got a year or so until graduation and I'm hoping that I can bring my work up from the novice level that it's at. ^_^